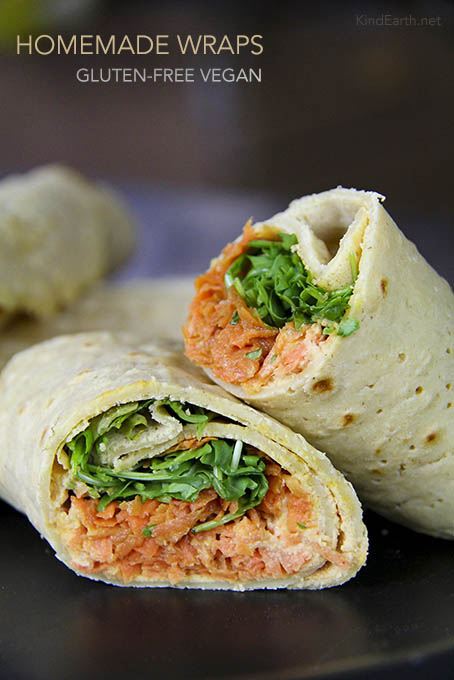
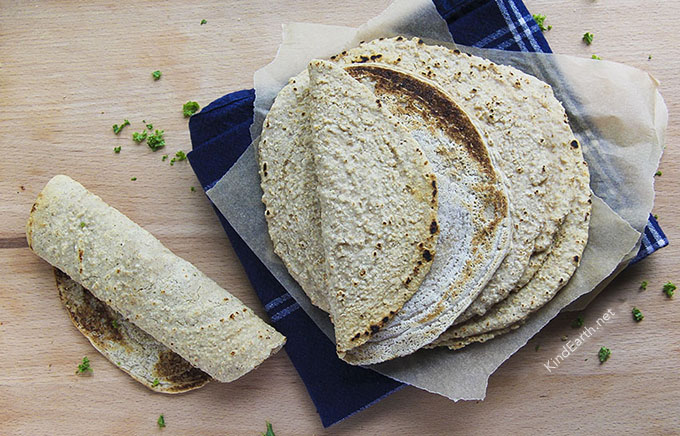
Quite possibly the best thing since sliced bread – gluten-free vegan wraps that work. Homemade, gluten-free wraps that are wrappable. We are talking about an excellent, healthy tortilla-style wrap that you can use in a multitude of different ways. You might have already noticed some of the nasty ingredients in the packaged varieties.
Today my friends, I am sharing my favourite homemade gluten-free vegan wrap. There are loads of important tips in this article, so it is worth taking a little bit of time to read it. In addition, my video gives you a very helpful step-by-step visual guide from straight from my kitchen.

Gluten-free vegan wraps using the batter method
Over the years, as a recipe developer, I have experimented with various different versions of gluten-free wraps. There are two main methods, the dough method, and the batter method.
My favourite method, by a long stretch, is the batter method.
Why?
- TIME-SAVING 🌱 The batter method is the fastest way to make wraps as there is no kneading or rolling required.
- MORE WRAPPABLE 🌱 The extra liquid in the batter (compared to the dough method) makes the wraps more pliable and wrappable. This is quite important as we aren’t using gluten, (which tends to offer more elasticity and pliability). So we benefit from using a slightly different way of making the wraps from the get-go.
Important things to know before making your gluten-free vegan wraps
Get the right pan
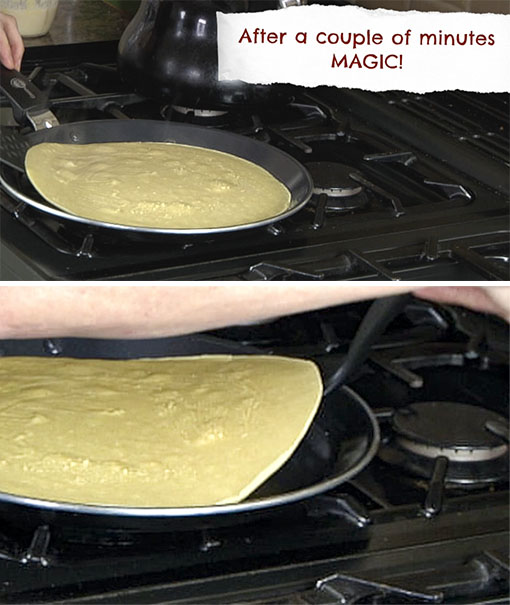
You have a few options here, although for best results I recommend a non-stick crepe pan or well-seasoned cast-iron skillet with shallow edges. Personally, I have used a cast-iron skillet for making wraps, for the longest time, but please know that if it is not well seasoned then the batter will stick to it! Recently, however, I discovered the ‘Greenpan’ non-stick, ceramic crepe pan. This is a toxin-free, flat-bottomed, shallow-edge pan ideal for gluten-free wrap making. The shallow edges make flipping very easy. The heat also distributes fairly evenly. It is the pan that I am using in the video (and photo below) and I highly recommend it.
Alternatively, use any flat-bottomed non-stick frying pan. If it is non-stick then no oil is required. After a couple of minutes, the batter should peel off like a dream.
Be careful if you use a stainless steel pan. You will need oil to stop it from sticking and it might still be hard work to achieve desired results. I gave up on steel pans for batter because they are just too stressful.
Pan that I recommend for gluten-free vegan wraps…
Get a lump-free batter
You will be glad you did this. We are looking for a lump-free batter for the best gluten-free wraps results.
- The easiest way to do this is to toss all ingredients into a blender and blend for a few seconds.
- The other way is to push the flour through a fine sieve, add the water and then whisk the batter vigorously with a whisk or a fork.
- The final option is to push flour down in a mixing bowl with the back of a spoon and then add water slowly, mixing thoroughly trying to eliminate lumps manually. However, you will still get tiny lumps of chickpea flour this way. But it is better than nothing if you don’t have a sieve or blender to hand.
Heat the pan to medium-hot, but not too hot
First of all, you will need to heat the pan to medium-hot heat. You will know it is ready to use if you drop a few drops of water on the pan surface. If those drops of water sizzle, roll away, and evaporate then the pan is ready for your batter. Wait until it is hot enough otherwise the batter will stick and you will have to scrape it off.
What happens if the pan gets too hot?
Once your pan is hot you then need to maintain an even temperature. If you leave the stove heat at the same setting then it is likely the pan will keep getting hot. If you are making a big batch and have the pan on for a while then heat accumulates. Science I know haha! In which case, you might have to turn the heat down to keep an even cooking temperature.
If it gets too hot you might find the following problems…
- You can’t swish the batter around the pan quickly enough to the edges before setting, which will create an uneven wrap.
- The batter might get lots of mini holes in it.
- The wraps might burn underneath.
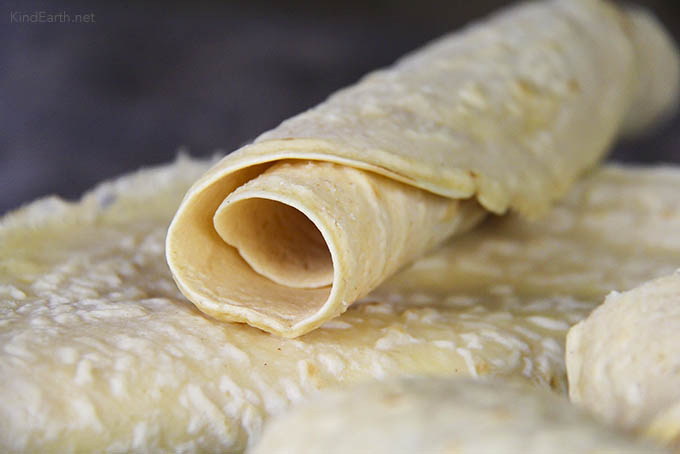
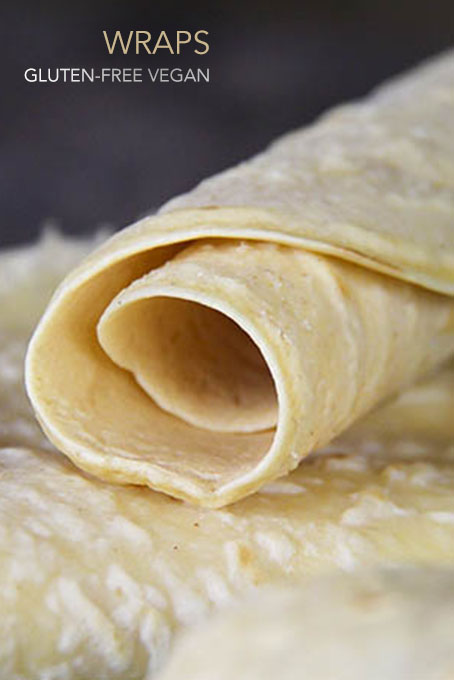
How to get your gluten-free wraps soft and wrappable?

If you use your wraps straight out of the pan they are going to be slightly crisp and a little brittle. Basically, that means you won’t be able to use them as wraps.
The trick to making them wrappable is to let them rest for at least 10 minutes in a tea towel.
Use a clean, lint-free tea towel (as we call them here in the UK) or dish drying cloth/dishcloth (USA). Put your wraps into the tea towel as soon as they come out of the pan. Stack them on top of each other and make sure they are in there for at least 10 minutes.
What does this do? It allows them to have a ‘mini-steam session’ in the cloth, which in turn makes them soft. This results in a perfectly wrappable gluten-free, vegan wrap.
Gluten-free Vegan Wraps Recipe
Gluten-free, vegan wraps that work really well for wrapping. A great tortilla-type recipe. See the article above and video for loads of other helpful tips.
Ingredients
- 100g (¾ cup) chickpea/gram/besan flour
- 50g (½ cup) gluten-free oat flour OR tapioca flour/starch
- Pinch of sea salt
- 225ml (just under 1 US Cup) water
Instructions
Make the batter first
- Make the batter first by blending all ingredients in a blender. Using a blender is the easiest method and means your batter is ready to use immediately. Alternatively, pass flour through a fine-meshed sieve before adding the water and whisking thoroughly with a fork. These are important steps to prevent lumps in the batter.
Heat up your pan to a medium-hot heat
- Heat a flat-bottomed, non-stick pan or cast-iron skillet. You need a medium to hot heat before pouring in the batter. If it is not hot enough the batter will stick. If it is too hot then the batter will not spread properly and will then get lots of mini holes in it. See tips in the article above for more info on getting the right heat.
- When the pan is hot enough, pour on about ⅓ to ¼ of the batter. Tilt the pan quickly (see video below for a visual demo of this) to let the batter spread evenly over the whole pan. This will create a round-ish shape.
- Let the mixture cook for a couple of minutes. Leave it be.
- When your wrap is ready to be flipped over you will be able to get a spatula underneath easily.
- Flip the wrap over. I find it easiest to do this part with my hands, but you can use a spatula too.
- Let your wrap cook on the other side until it is gently tanned. This should take a further one or two minutes.
Next, make your gluten-free wraps soft
- When ready your wrap will be a little brittle or ever so slightly crispy. We need to change this by letting the cooked wraps sit for at least 10 minutes in a clean tea towel (dish drying cloth) in order to get soft, wrappable wraps. This method creates gentle steam and softening action. It is important to do this if you want them to soften.
- Once they have softened in the tea towel they are ready to use.
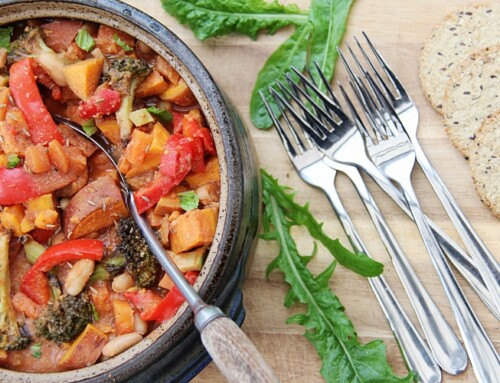
- You can serve them on the side with a stew or curry. You can use them as a wrap and put your favourite hot or cold ingredients inside. I have demonstrated how to fold them as wraps in the video below.
- Please remember to let me know how you get on and feel free to share this far and wide.
- Big love x
Recommended Products
As an Amazon Associate and member of other affiliate programs, I earn from qualifying purchases.


Pin on your Pinterest board for later…
Do you want an ALL Oat Wraps Recipe instead?
This is a very popular recipe on my YouTube channel. Using oats, a pinch of salt, and water. Remarkably effective…
These look so delicious!! What a great flour combination. I love how rollable they are too. I will definitely be making these ASAP ❤️
How lovely to see you here Harriet.
I am happy to hear you will be making these. I hope life is treating you well – I love seeing your photos of your sound baths and the wonderful work you are doing. I look forward to hearing how it goes xx
WE Love these wraps* When I am cooking for my gluten loving family pod I can eat my gluten free**although they all want a sample so i make a triple batch* thank you sister* I love your simple easy yet full power recipes* love from Montana*
Awesome 👏 I am happy to hear it rudaina. Love to you in Montana
These look amazing! I’m eager to try them but I’ll be the only one eating them. How long do they keep in the refrigerator, and can they be frozen?
Hi Lisa,
They are best served fresh. However, the good news is that they freeze well. When freezing these wraps I put a layer of parchment paper/baking paper between each one to help if I want to take them out individually. You simply let them defrost before using them. After being in the freezer, they definitely benefit from a very quick reheat to soften them back up tho before using as wraps. In fact, that makes them almost taste fresh again.
I’ve never had any left over to put in the fridge, but that is an excellent question. I have refrigerated the oat wraps before (which go nicely in the fridge). But with the ones on this page… hmmm, I imagine they would keep for a few days in the fridge and would then benefit from a very quick reheat on the pan to soften them and make them wrappable. If you try please let me know what you do and how it goes. I’d love to hear.
Tried these today and they are incredibly easy to make. Can’t believe how pliable they are and they hold firm as a hand held wrap, too. Really filling! I feel like I can slightly taste the bitter edge of the chickpea flour, so am hoping to try adding other flavours to the batter. Not sure where to start. I found the batter was easy to run around the pan to make a round wrap, more so than the oat ones, so that’s good 🙂
Great! These ones are runnier than the oat ones, withe a ratio of flour to water that works better. The oat ones seem to work a little better if they have less liquid and are spread with the back of a spoon rather than tilted and tips (as in the above).
I made these today and added some crushed chillies, cumin seeds and tomato puree 🙂 I am glad to hear that you are playing with them!
Just wondered about the pan.. can you tell me what pan to use as did away with all my nonstick pans.
want to start doing this but all my pans are stainless steel.
Hi Marion.
This is the actual pan I have for these wraps: https://amzn.to/4snjGza